How to Convert GoPro flat to REC709 LUT? (Full Guide)
As an Amazon Associate, I earn from qualifying purchases.
GoPro flat is an option like shooting in Raw. The newer model can shoot in a flat. It is called Protune Flat. It gives the flexibility in post-processing than GoPro’s default color option. It gives the ability to shoot in native white balance.
And there is REC709 LUT, which is a type of color space that gives a more natural-looking and realistic image. The REC709 LUT gives cinematographers a better and more neutral starting point for their color grading process.
Converting Flat images to REC709 LUT is an easy process for any video editing software. You just need an updated video Editing software.
The Software you can use
It is very time-consuming for you to color correct every clip on the video. This is why I am giving 10 free REC709 LUTs.
You can use these in Premiere Pro, After Effect, Final Cut Pro, and many other video software.
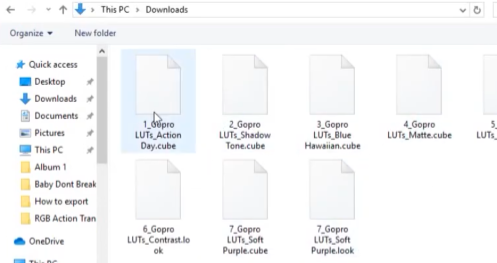
Download them and unzip the files.
Convert GoPro Flat to REC709 LUT
Step 1: Import your GoPro Footage to Premiere Pro
- Open Premiere Pro.
- Double Click the Project bin from the down left corner
- Browse the Flat Footage you want to convert and import them

Step 2: Open Lumetri Color
Open Premiere Pro then open the “Lumetri Color” Tab.
First, open the “Window” from the top left corner of Premiere Pro.

Then select “Lumetri Color”

Step 3: Upload the LUT files
After Opening the Lumetri Color tab you will see a separate window will appear on the right side of Premiere Pro.
Then under the “Creative” section, you will find the “Look” option.

Click the drop-down arrow and Browse the LUT files
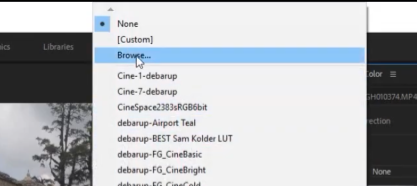
Now simply find the LUT files you just downloaded. Find the .cube files and upload the file. Check on the website which color grading you want to apply to your footage.
By simply doing that you will see the color has been applied to the selected footage.
You can apply multiple LUTs in several clips in videos by doing the same procedure.
Step 4: Export the file
After doing all the steps I hope you have found your preferable color graded footage. Now click “File” from the top left corner then “Export” > “Media”.
Or Click Control+M to do it fast.
This will lead you to export settings. Choose the file format you want to keep.
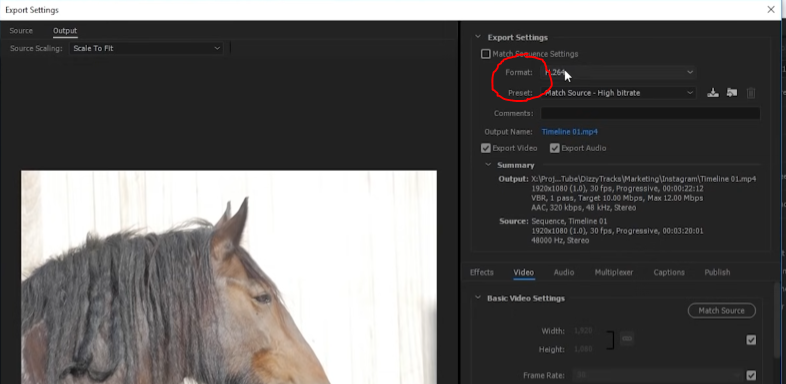
After adjusting all the video settings click “Queue” to start rendering.

How Will You Know The Color Has Been Applied?
You can check it by playing the clips from the timeline, or Unselctthe Lumetri color from the left corner.

Before:

After:
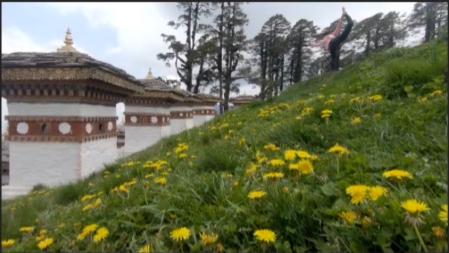
You will see the difference.
The color will vary with the LUT you chose to apply. So I will suggest checking the LUT before you apply.
The Website has the footage with the LUT applied to it.
If you are not satisfied with the colors you always tweak some color settings by changing brightness, contrast, or saturation from the Lumetri color section.
Final Words
Professionals shoot at the flat to play with the colors of the footage. This is why normal videographers tend to do this. But they don’t know how to convert the raw videos to professional-looking videos.
So in this article, I discussed how to convert a GoPro flat to REC709 LUT. And anyone with normal video editing software converts their raw files.
Related Posts:
Related Posts

DJI Mini 3 review
![How to charge GoPro 10? [4 methods & 10 tips]](https://cameratroop.com/wp-content/uploads/2024/02/How-to-charge-GoPro-10-4-methods-10-tips-660x470.jpg)
How to charge GoPro 10? [4 methods & 10 tips]