
How to change canon mx922 printer defaults on mac? (Step By Step)
As an Amazon Associate, I earn from qualifying purchases.
How to change canon mx922 printer defaults on mac?
The Canon mx922 printer can pair up with both Windows and Mac systems. But setting the Pixma mx922 printer with Mac OS is a bit trickier. And if you want to change the MX922 Printer as a default printing machine on Mac, you have to face a lot of trouble.
But that is not a groundbreaking thing that you would need a technician. If you wonder how to change MX922 Printer defaults on Mac this article is for you.
Set your Default Printer on a Mac
If you don’t have the default printer preset on your Mac, you have to chase that printed document around your home or office. This is why set your Canon MX922 printer where it is most convenient for you.
To set the MX922 Printer default on your mac, you will need the Printer Model Number and the Printer Manufacturer.
Here are the steps on how to change MX922 Printer defaults on Mac:
Step 1:
Check to see if the printer is properly connected and powered on.
Step 2:
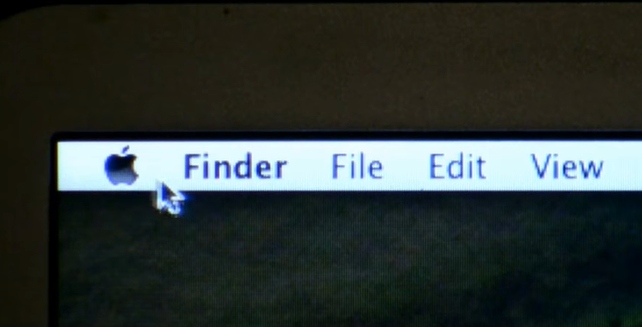
Click on the apple-shaped icon in the top-left corner of your Mac and select “System Preferences”

Step 3:
Click on the Printer and Fax icon from the new window that pops up.

Step 4:
Find the menu labeled either “Selected Printer in Print Dialogue” or “Default Printer”
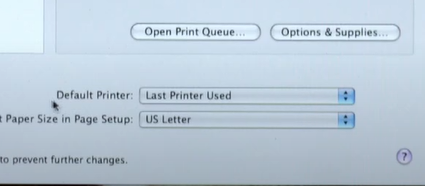
Step 5:
Select the printer named Canon MX922 from the default menu. You will see the MX922’s model number and the Manufacturer’s name.
Step 6:
Print a test page to see if it goes to the Canon MX922 Printer.
If you have the page printer automatically in the MX922, you know you have changed the MX922 printer to the default printer on your Mac.
Read Also: How to Setup Canon MG3600 Wi-Fi? (Step By Step Guide)
Read Also: How to reset Canon System Management PIN? (Step By Step)
Pixma MX922 Wireless Setup on Mac
To connect the Pixma MX922 with Mac you need to follow two parts.
- Start the setup on your printer
- Download and run the setup files on your computer
- Start the Setup on your Printer
- Press the Menu Button on the printer
- Use the arrow keys to highlight WLAN setup, press OK
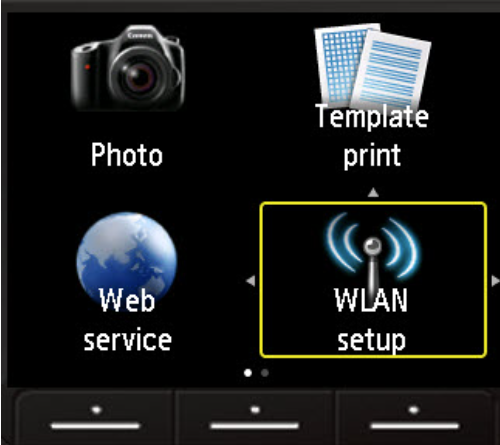
- After doing that the printer will search for nearby networks. If there is any network, a screen will appear with the Standard setup. Press OK. And select your network using the up/down keys.
- If your network has a password, type the password and connect to the network.
- When the printer attempts to connect to the network, Press OK.
By doing these your MX922 Printer is successfully connected to the network. And now it is time to download and run the setup file on your Mac.
- Go to the Pixma MX922 website and download the latest version of the MX922 software. The page needs the operating system with Mac for you. Under Software and Drivers, download the latest driver of the MX922.
- After downloading the drivers, download the right Canon IJ Network Tool. As you are a Mac user, you need this software to configure the wireless settings.
- Go to the location where the software has been downloaded. Install them and follow the instructions.
- After this restart your Mac system and follow the previous instruction on how to change Canon MX922 printer defaults on Mac.
If you are still have confusion about connecting the Pixma MX922 with your Mac, read this article and follow the steps.
Install Canon MX922 Printer on a MAC
To install a Canon MX922 printer on a MAC, follow these steps:
- Check that the printer is turned on and connected to the same network as the MAC.
- On the MAC, go to the Apple menu and select “System Preferences.”
- In the System Preferences window, click “Printers & Scanners.”
- Click the “+” button to add a printer.
- The MAC should automatically detect the Canon MX922 printer on the network. Select the printer and click “Add.”
- If the printer is not automatically detected, you may need to add it manually by selecting the “Add Printer or Scanner” option and following the on-screen prompts.
To Update the Canon MX922 printer driver on a MAC,
- Go to the Canon website and search for the latest driver for your printer model.
- Download and save the driver to your MAC.
- Open the downloaded driver file and follow the on-screen prompts to install the driver.
- Restart the MAC and the printer.
Read Also: How to Fix the Canon B200 Error on MX922? (Explained)
Read Also: How to Fix the Canon MX920 Printer Not Responding?
Conclusion
Canon is a well-known manufacturer of high-quality printers. Unlike Windows computers, Mac users have been confused about how to change MX922 defaults on Mac. As the Mac operating system has many confusing functionalities it is pretty hard to change the defaults.
Hopefully, after going through this article you won’t have any confusion about how to change Canon MX922 printer defaults on Mac.
Related Posts
Canon system management pin reset: Step By Step
Canon mg3600 wifi setup: Step By Step Guide